To view this content, you must be a member of Thomas’s Patreon at $1 or more
Already a qualifying Patreon member? Refresh to access this content.
If you are like me you get annoyed with the constant focus tracking of your webcam in Klipper. This got me wondering if it was possible to turn off the autofocus, and after some research this is the method I came up with. I hope you find it as useful as I did. This worked perfectly for my C920, but it should work on other cameras as well. The method should probably also work on Octoprint, if that is what you are using.
1. First step is to install putty 51 if you are in windows and this will let you login to the raspberry pi via SSH. If you are on Mac you should use a similar program for that. (I’m no Mac user, so don’t have any suggestions at the moment)
2. at the “Session” tab and “Host Name” field add fluiddpi.local, mainsail.local, whatevernameyouchose.local or your Raspberry Pi ip (You can find the ip in the administration panel of your router, which is usually the ip: 192.168.1.1, or something similar like 192.168.1.X), choose SSH, port 22, then click “Open”.
3. Username is by default pi, and password raspberry (If you have changed these, input the values you’ve changed to)
You have to go to folder “mjpg-streamer”, so you enter the command: cd mjpg-streamer/
Now enter sudo v4l2-ctl –set-ctrl=focus_automatic_continuous=0 to disable auto focus
Open a window with your Klipper webcam, preferably with an object in the center of the bed and fine tune the manual focus..
so enter sudo v4l2-ctl --set-ctrl=focus_absolute=70
and change the number until the focus is ok.
In this case, a number of 35, looks to be pretty good, so I’m running with that.
Now, you have your two commands that fine tune your camera. In order to run them every time you boot up your Raspberry Pi, you have to add them to the rc.local file:
a) enter sudo vi /etc/rc.local
, then go to line last line “exit 0”
b) press shift+O and write your two commands (you can copy and paste with left click)..
if you mess up something press esc and :q! to quit
if you are fine press esc and :wq to save
It looks something like this:
Some additional info:
if you set focus_auto to 1 and let the webcam focus an object in the center you can take the “perfect” focus value..and then focus_auto to 0.
To find the value, You have to run the command sudo v4l2-ctl -l
and you will see a list of settings for the webcam, in this case you should be looking for:
“focus_absolute (int) : min=0 max=250 step=5 default=8189 value=*”
The * in this case is your “perfect” value according to the camera. The reason I add this as additional info instead of including it in the main part, is that it didn’t work too well for me. It gave me a value of 40 instead of the 35, I got to by looking at the webcam feed. This is probably because some other area of the printer, like my textured sheet kept the focus instead. This might be different for you though, so it’s worth a try.
You can play with the other listed settings also..(like contrast with sudo v4l2-ctl --set-ctrl=contrast=200
)
I hope you find this article useful. Have a great day everyone!
I got a few hours in today as well.
Today I focused on belt tighteners, since I now have room for them, after the rework I did yesterday. They are inspired by what I recalled about the tighteners for the Voron V0 Nema14 stepper motors since I liked that solution.
I also did other smaller fixes after the resizing of the printer, and I’m happy with the progress I’ve had lately.
I hope everyone has a great day!
Hi all!
Got another 4-5 hours into the Fenrir design today.
Worked on issues related to the size increase I did, and also worked on structural rigidness, so the parts are getting beefy. I also added a little depth wise on the printer, to make a little more room in the back, and it also looks better in regards to the Orbiter, which is not sticking out the back anymore.
I also removed the heat inserts for the Y axis linear rails, and added a Nut bar for them as well, to make it easier to build it, and it also will make it a bit more rigid. (The Z axis linear rails already had them).
I’ll be back soon with more updates.
Thanks,
Thomas.
Painting 3D prints is a fantastic way to add vibrant colors and enhance the appearance of your creations. Whether you want to bring out intricate details or simply personalize your models, this article will provide you with a comprehensive guide on how to paint 3D prints. We will cover the preparation process, suitable painting techniques, and essential tips to achieve outstanding results.
Before painting your 3D print, it is crucial to prepare the model properly. Here are the recommended steps:
Selecting the appropriate paint is essential for achieving high-quality results. Acrylic paints are a popular choice for painting 3D prints due to their versatility, wide range of colors, and compatibility with various materials like PLA and ABS. Look for paints specifically formulated for plastic or multi-surface use.
Remember, practice and experimentation are key to mastering these techniques. Don’t be afraid to try different approaches and find what works best for your desired outcome.
Hi all!
I’ve been working a lot on Fenrir since the last update, test printing parts, redesigning to improve on the design, etc.
There’s still more work to do, but here are some updated renders, etc.
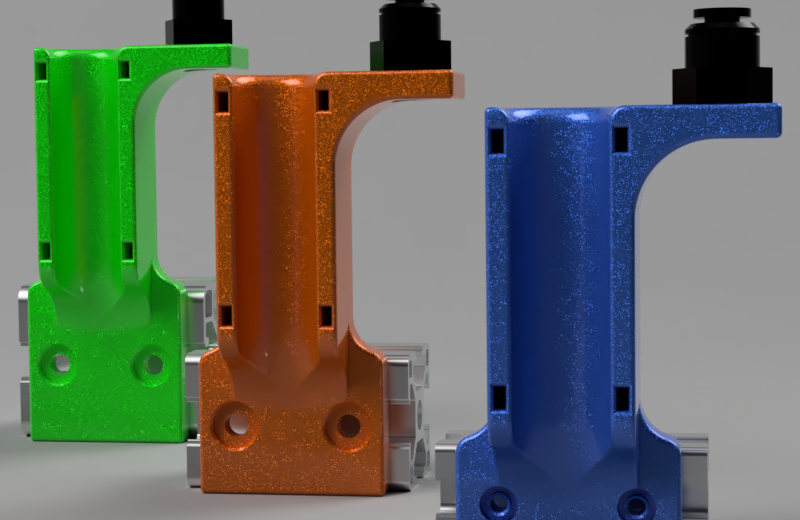
After splitting up the parts, I wasn’t happy with the rigidity, so I made them a lot beefier to get it up to the rigidity I want the printer to have. I’ve also increased the size of the door heightwise.
As you can see in the renders, I’ve got the parts in varying colors to make it easier to see the separation between parts.
I hope you like the updates, and I’m looking forward to bringing you the Fenrir design soon.
Thomas the MakerViking
Hi everyone!
I wanted to take a moment to apologize for the lack of updates in recent times. I have been working diligently behind the scenes, testing and modifying the various components of the Fenrir project.
As you may have noticed from the image above, I have decided to split the Fenrir parts into smaller, more manageable pieces. The reason for this is to make the printing process much easier for all of you. Printing large parts can be a challenge, especially when using ABS, ASA, or PC. By breaking the parts down into smaller pieces, I have been able to resolve this issue and make the printing process smoother for everyone.
Additionally, by splitting the parts, I have been able to increase the size of the printer by a few centimeters. This was needed because I had set strict constraints for myself, with the goal of ensuring that the parts would be printable on a Prusa MK3 or larger. Now, with the changes I have made, this is no longer a concern.
Thank you for your understanding and patience. I look forward to providing you with more updates soon.
Thomas the MakerViking